Going to start with some more blogging me thinks, will do my best to keep this page up to date with all the work I'm up to now (hopefully including pictures!)
For now check out the other pages I've got going on :D Please
https://www.facebook.com/SouthWestBumpkins
&
https://www.etsy.com/shop/SouthWestBumpkins?ref=hdr_shop_menu
Kate Nayler: Metal Smith
Monday, 8 December 2014
Tuesday, 5 July 2011
Back from New Designers...
And I've realised after promoting my blog at New Designers, I do not have enough of my work displayed on it.
Finally i'm posting some amazing pictures of Bean... Am happy to take commissions, please let me know!
And here is one of my bracelets, other pictures not uploading, but if anyone is interested in owning one of these lovely pieces, i will be on the make again very very soon so get in touch.
Please get in touch for any reason, would be great to hear feedback on my work :D
Sunday, 12 June 2011
Final Major Project Build: Bean Chair
For my final major my work has developed into a larger scale, using 12mm steel rings I am going to create of a functional piece of sculptural seating.
My research started with looking at festival art, which has now inspired me to design and make a bright colour eye catching piece for outdoor use, with a night time glow, for effect and functional purposes. Then after looking into different shapes and also ergonomics, i was able to start the designing process.

My research started with looking at festival art, which has now inspired me to design and make a bright colour eye catching piece for outdoor use, with a night time glow, for effect and functional purposes. Then after looking into different shapes and also ergonomics, i was able to start the designing process.
Designing the shape:
Using polystyrene I carved and sanded a range of different shapes that could be used for my seat.
I chose this one as I felt would be the most confortable:
I chose this one as I felt would be the most confortable:
Building the mould:
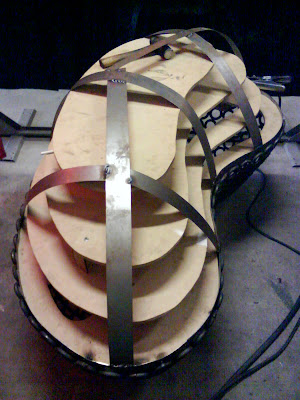
To build the mould I had to scale up the polystyrene shape. I did this by slicing the piece in half then evenly dividing up that half. Then using a scale of 1:125, I sized up each slice, then I cut out these larger shapes in wood and attached them together, using 9cm blocks to space in between.
By attaching steel strips on to the mould I am hoping this will help by giving me more surface area to follow when welding my rings together.
Finished mould:
The start of the build:
To start build I first had to start by making a substantial amount of rings, made out of 12mm steel bar. This was a very time consuming process. Researching into sourcing rings, lead to conclusion of expensive, maybe to be thought about if commissioned.
Closing rings started on the forge, heating the rings and then hammering them closed. After a chat with Richard, he showed me that I could do it cold, with tongs and a hammer, which made this process a lot quicker.
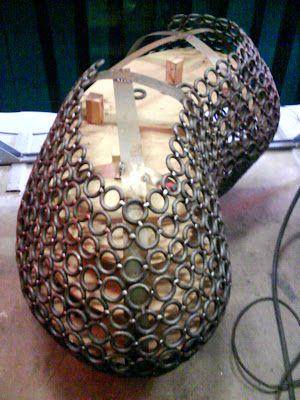
To start to weld I first fixed one ring to the mould itself, then connected the rest off that one (fixing to the mould in some places for support). Then adding layer by layer...
The mould did come in use, but didn’t work as well as had hoped, this meant I did have to do most of the shaping by eye when welding, which was hard, but became a lot easier as I went on. When i was finished i had to remove the mould from the inside.
I had to make sure I had welded up the whole of the outside, before removing the mould and then also welding all of the inside after removing it, I am doing this to make the structure of the piece secure to be sat on.
The mould was then re-attached, but opposite to the ring structure, this wasn’t too hard, as I had left the main centreboard attached, so I could just build on that (also thinking about properly lining them all up the same as before).
Adding the steel sheet again was difficult and I did have to think about if they were necessary, but I felt that they were needed to help me shape the piece while welding.
Finished re-attachment:
At this stage I had to start making and closing rings again. I calculated the 1st half took a total of 430 rings to make, so this was my target. I had got a lot quicker at this process, but it was still very time consuming.
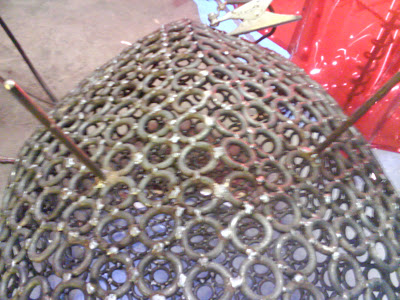
Starting on the next side was very hard, trying to make them both match was a very difficult target to reach. With this half I took photos of every layer I added until completion:
Side view:
When I had built the whole structure I had to then cut out a hole.
Section cut out:
This hole was the used to break out the mould from inside (which was done using saws and hammers to destroy it).
And then was used as an entrance for me to get inside to weld up that too, for extra support to the structure.
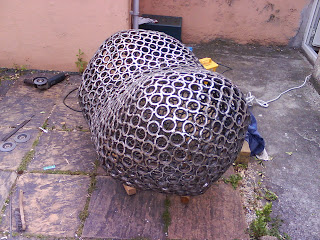
This was also the point where I had to do my best to clean it up too before closing it up again. Then I welded the back on the cut out piece too, and then welded that in to place, to create one solid bean structure:
When deciding on legs I first had to choose the design that I was going to use. I decided on simple bar legs, which then lead me to looking at what size bar or maybe even tube to use. I went with 12mm steel bar, to match the rest of the bar used for the piece. I measured out the lengths I needed for the position of the seat I liked the most (cutting on the ban saw). Before attaching them I bevelled the ends, to make it less rough on hard flooring. I tack welded them on while in place, and then secure welded after turning the piece.
Back legs:
Front legs:
Whole bottom of piece:
After legs were attached, seat was able to be sat on, and test if the structure was strong enough for one...
And also two...
Finishing:
To finish the piece bean had to be made mobile, to move back to my home to work on. This was done using a trolly and a van.
Mobile bean:
Unfortunately for get the piece in my garden I had to cut off a leg. This has made it hard for me to progress on with any spray until i can get it sorted.
Leg stump:
I started cleaning up the outside in my garden,
by grinding down all the sharp or bumpy welds.
This then developed into me grinding every weld, as I liked the look of the shiny metal, a look that I wanted to create on this piece, but thought wasn't possible.
Due to technical difficulties and also my own personal preference and feeling about the piece, I have decided not to spray it and to just grind, file and rub down as much as possible. This is because I really like how the outside shines in the sun, and the darker more rustic metal is locked on the inside.
These are some images of the bean, it is not yet 100% finished, so no professional completed shots as of yet, but as soon as I have some they will be uploaded!

Thank you for reading... and please feel free to feedback on my first blog! :D
Saturday, 11 June 2011
Subscribe to:
Comments (Atom)


